Thoughts on newspaper weaving

As you have probably seen I went through a stage of weaving newspapers. There are some beautiful videos and websites from Russia, where there are brilliant experts at this craft giving tutorials. I spent many hours watching the videos and trying to listen and watch how the paper sounds and reacts. Was it strong, did it sound like wicker or was it just solid. I am a fool to myself, I always want my handmade things to be strong, survive any sort of handling but I also want it to feel natural and handmade.

sam_1382

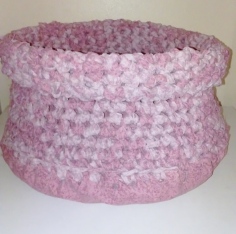
One of my newspaper baskets with lid. I make the separate liner and lace decor from recycled fabrics.

These are the things that I noticed when making newspaper woven objects:

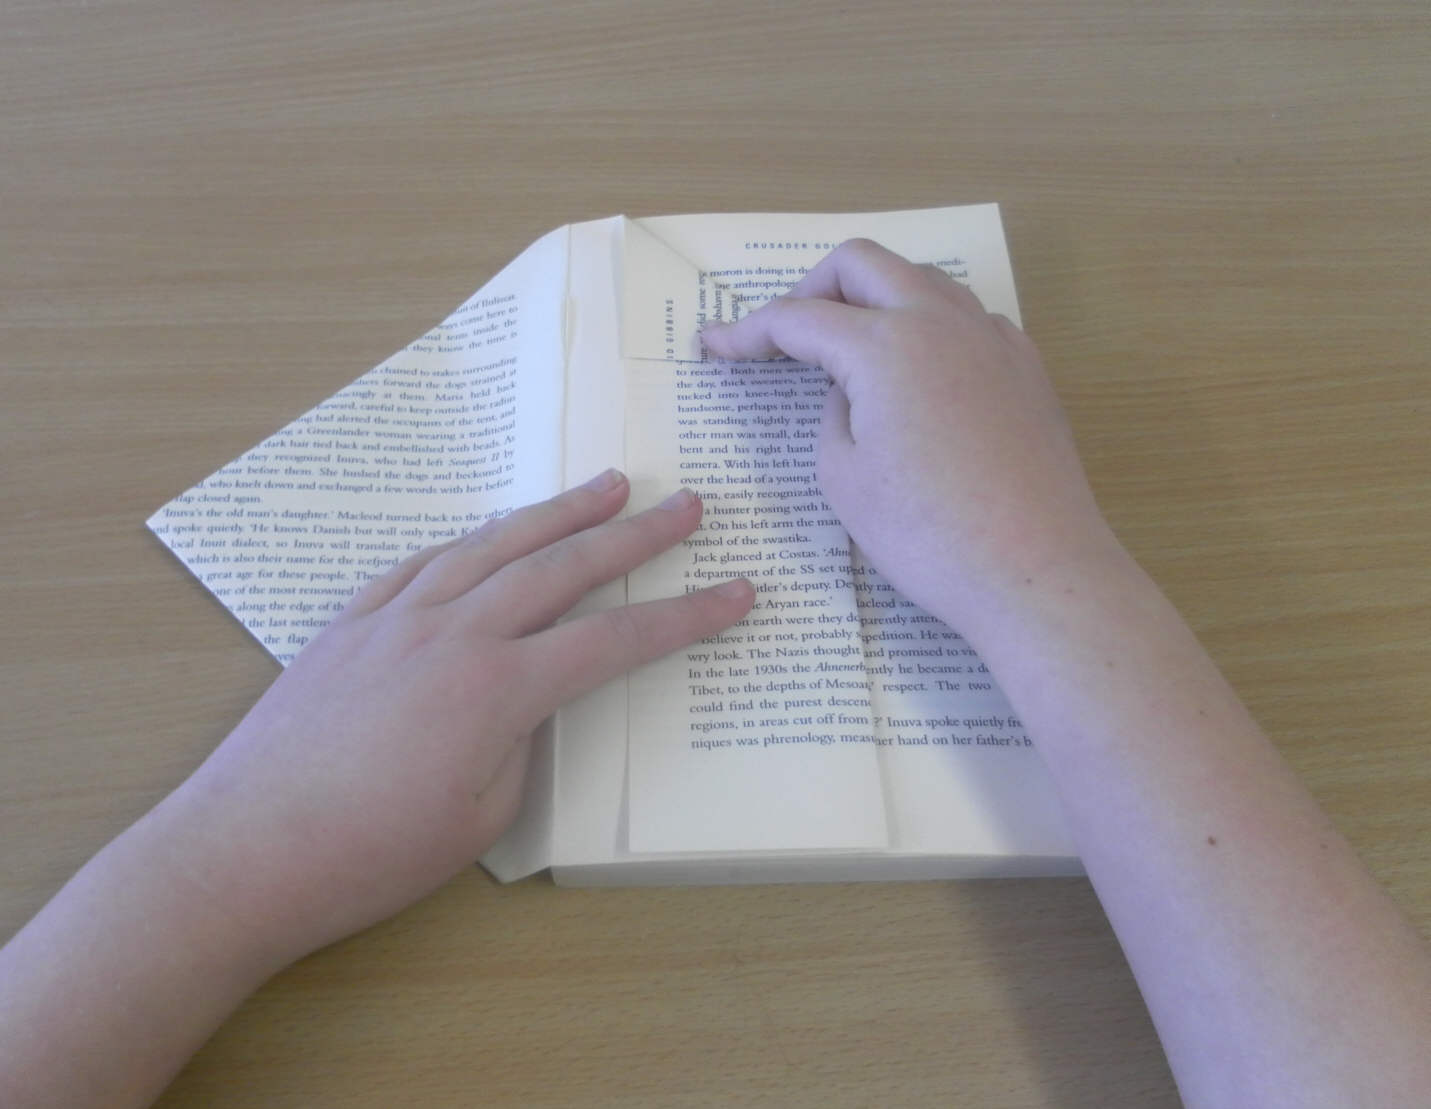
The finer and tighter that you can roll your newspaper/magazine sticks, the stronger the feel to your weaving. Also it makes it easier to weave neatly if your sticks are tight.

The only way I got an object to feel and sound like wicker was to varnish the sticks before weaving. This took forever as each stick was varnished individually and had to be dried before I could use it. Then you have to be careful that you don’t weave too tight or the varnish will crack.

I did paint, individually, the sticks with watered down, 50 household matt paint and 50 water. Wove the sticks into a pot, PVA glued then varnished. This didn’t work as well. You have to keep the sticks pliable and damp as the paint really dried them out. Very messy.

I tried all ways, and seeing I don’t speak Russian, and I can’t find the die/varnish in the UK that they die their newspaper sticks with so I went back to basics.

sam_1428

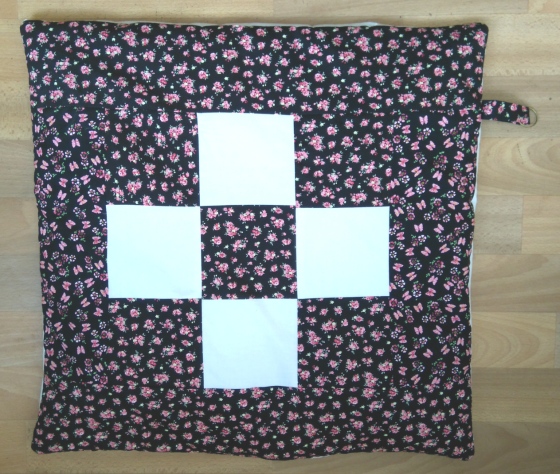
Recycled fabric liner with lace, ribbon and some beads.

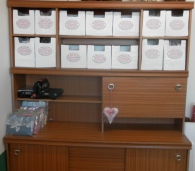
Forget Wicker. You are weaving a paper product. I have sewing machine covers, baskets and pots that have lasted for at least 3 years now, that I have woven from newspapers. I have dusted them, and wiped them down with a damp cloth and they still look like they did when I first made them. My cats have slept in them and on them, I have stored alsorts in them and they haven’t fallen apart, cracked or looked disgusting. They have gone through winters in the shed, hot summers in the house and still do what I wanted them to do.

I personally don’t like the different colours, but I have shown how I painted white baskets in one of my tutorials using PVA glue here. I like my paper weaving to look like wood, which is how the paper started in the first place. Therefore I weave the paper into the basket and then hand it over to my partner who uses the Ronseal Quick Dry Woodstain, silk or satin (I did’t like how the matt finish looked). He painted the projct twice to make sure that all the little bits were covered.

To finish and make them special I like to decorate with beads, lace, ribbons etc and recycled fabric to make a pretty liner.

sam_1383

I just hot glued the lace and flower onto this little pot.

I love newspaper weaving, and enjoy peoples faces when you tell them what the beautiful basket they are about to buy is made from i.e local rag, free paper or tabloid, the written word can be beautiful, even today!!!!!!!


Beds, beds and more beds!

I still haven’t managed to get either one of my little boys to sleep on the last one I made. There are so many around the house now, with all of my experiments, they would rather not have to make a decision so sleep on my bed instead.

staker

Stalker after a hard morning, I would love to know what he is dreaming about. He always has a smile on his face!!

So this week I have been trying out my fabric yarn and crochet. This little bed worked out perfectly. Not very inspiring colour wise, but now I know what size it turns out and how much fabric I need I will be able to make them alot more colourful.

It started with a recycled cotton bottom sheet.

dsc_0202

Then I tore up the fabric to make my yarn ready for crocheting. There are lots of websites on the net with tutorials on how to make your own fabric yarn. Very simple, you just need to have a large crochet hook to crochet it with.

dsc_0204dsc_0205


I made a small pillow with the fabric, before I made the rest into fabric yarn. I then crocheted round the pillow and made a lovely warm cuddly little bed. (Yes, another one!!)

dsc_0209dsc_0208


Crochet fabric yarn is lovely and thick so stands up on its own, but is still slightly stretchy and soft. I made this little bed with less than a single sheet size of cotton fabric. It measures 12″ across (nice size for small cats or kitten) and stands 7″ tall with the top folded over, the cushion inside is about 5″ deep but sinks to about 3″ when someone gets in. So it is very cosy and very durable. These will definitely be going into my shop, with a little tweaking and a bigger size, and some decoration, after Christmas.

This weekend I have been busy trying things out to make for the shop. Along with this little bed idea I have made an easy 30 minute make cat pillow. I had seen these no sew, quick pillows before, made from fleece or tshirt fabric. The fleece doesn’t fray, and the tshirt fabric doesn’t fray and stretches. I wondered what would happen if I made it from the left over cotton fabric from the last cat bed. And this is what it turned out like………dsc_0214Perfect, I used to love making the rag quilt bags and I can imagine after a few washes this little pillow will fray and look shabby chic just like the rag quilts. I can see alsorts of designs with this one.

I am still working on my new Etsy shop. Working towards putting items in the shop after Christmas. Alot of the things I will be posting will be hand finished or hand made as I am doing most of my crafting now in my new boarding cattery (sewing machine noise is not acceptable). I am sitting there keeping my little guests company, having catty conversations and crafting. A wonderful way to spend my days…………..

dsc_0166

My crafting chair, and a little guest.

Cat mats

My two little boys have never had so many cat beds or mats to fight over before! And I promise you they do fight, they are twin brothers and don’t like sharing unless they have to. And I have made lots of cat beds and mats in the last couple of months, not only for my new Cattery57, but I am also trying to design a nice easy, cosy cat mat to start my Cattery57 Etsy shop. I want to keep the ethos of using recycled fabrics, but they need to be cosy and look pretty enough to leave lying around the home. So I have gone back to patchwork, but with a little twist of hand embroidery on some tiny kat kickers that are attached, they are removable to enable washing or to put your own cat toys onto the mat.  This is my prototype, I am in the process of embroidering the little kickers which will be attached tomorrow.  The mat measures 21″ x 21″, 2cms thick with wadding, this one is Butterfly and Flowers fabric, (although that will change due to the fabrics being recycled), fully washable, and my two boys love sleeping on it, although with the clocks going back I have had trouble catching them sleeping today!!! But I promise photo’s will be available tomorrow!!!!!

dsc_1152

My finished paper mache storage boxes, at last!!

It wasn’t until I received a message from a reader to say that I had shown the start of my storage boxes but hadn’t shown how they look now that they are finished. I must apologise, this project was in my blog in April!! So here is the update as to how they look (I did finish them in June, honestly!)

SAMSUNG DIGITAL CAMERASAMSUNG DIGITAL CAMERA


This is how they looked in the beginning. just recycled cardboard and masking tape.

For my paper mache I used small pieces of brown Kraft paper and a 1:1 water diluted PVA glue. The boxes were covered, inside and out, with about 3 layers of the paper mache (leaving to completely dry between each layer). They were then painted, inside and out, with a household matt white paint. I needed to do two coats of this to make sure the Kraft paper was covered and the finished boxes looked white. Then came the final coat of household satin paint. I love satin paint, it isn’t as shiny as the gloss and is alot easier to paint with.

SAM_2031

SAM_2030


They didn’t finish as hard as I thought they would by using the PVA glue, I should probably have done it the old fashioned way and used a flour/water paste mix for the mache. But they still serve their purpose and I have gained alot more storage room on the shelves, and it looks alot neater than before.

I carried on with the recycling ethos and made labels for each box. To do this I printed a label with a design, stuck it onto a piece of recycled cardboard and covered it with transparent plastic. To attach the labels to the boxes I used gold coloured split paper pins.

blog

And this is how they ended up.

SAM_2033I had been looking at the price and sizes of storage boxes, none of them would have fitted my shelves or looked as neat, or been practically free!!

Folded Book Birdhouse 1.

SAM_1693I wanted to add some props to my photo’s for my Etsy shop, something pretty, recycled and different. Eventually I found these pretty little birdhouses made from paperback books at redhenhome.blogspot.co.uk. Very easy to make, although I did make one change to the instructions to make it a little easier on my wrists!

SAM_1696Take one paperback book, I read quite a bit so there are lots of these around the house.

SAM_1697Remove the outer cover. Quite easy to just pull off as it is only glued on.

SAM_1698For one nice fat bird house you will need approx 200 hundred pages. So if you look at the page numbers on your book, if it begins at page 1 you need to find page number 400. Press the book down to break the spine.

SAM_1699

Tear off the rest of the book that you don’t need. (Keep this other bit as I will be showing you another way of doing these bird houses, using less pages in my next tutorial).

My change to the instructions:

page

Most people fold their pages right to the spine (or inside) of the book, I don’t. My wrists are quite fragile and when you get near to the end of your folding you will find the book begins to get very awkward to fold and to hold onto the pages you have already done. So I just fold each page to the edge of the text. As you will see in the following photo’s. This also gives a nice little flat platform at the top of the finished birdhouse for any added decorations you wish to make.

First Page

SAM_1734Take the top corner and fold down in line with the text. Press flat.

SAM_1736Hold it down.

SAM_1738Fold the bottom corner up, in line with the text. This will overlap your last fold a bit to look like a little V shaped pocket on the outside edge of the page.

SAM_1739

You have finished folding this page. Go to the next page of your book.

Second Page

SAM_1740SAM_1741Fold this page in half to the line of the text.

SAM_1742Press down along the fold.

SAM_1743Take the top corner and fold down to the edge of the page

SAM_1744You have finished with this page.

SAM_1745The next page is the same as the first:
The next page is the same as the second:

SAM_1746

And so on until you come to the last page!

To finish your gorgeous little bird house, just glue the first and last page together. You can either use, PVA, glue stick or double sided tape. I didn’t find a glue gun worked very well.

Now you can decorate it with ribbons, lace, beads, paper flowers etc. Just glue them on. Or leave it as it is, as a pretty and unusual addition to a book shelf or cabinet.

SAM_1695